Whirlpool Cabrio Dryer Instruction Manual: A Comprehensive Guide
Unlock optimal performance! This manual details installation, operation, maintenance, and troubleshooting for your Whirlpool Cabrio Dryer, ensuring years of reliable service.
Welcome to efficient drying! Your Whirlpool Cabrio Dryer is engineered for superior fabric care and convenience. This dryer boasts advanced features like moisture sensing and wrinkle shield technology, designed to protect your clothes and simplify laundry day.
This instruction manual provides a comprehensive guide to understanding and utilizing all the capabilities of your new appliance. From initial setup and operation to routine maintenance and troubleshooting, we’ll cover everything you need to know for optimal performance and longevity.
Safety Precautions & Warnings
Prioritize safety during operation! To prevent fire, electric shock, or injury, always disconnect the dryer before cleaning or servicing. Never operate the dryer if damaged.
Do not dry items that have been soaked in flammable liquids. Ensure proper ventilation to avoid gas buildup. Keep the surrounding area clear of combustible materials. Supervise children when near the dryer. Follow all warnings and instructions in this manual to ensure safe and effective use of your Whirlpool Cabrio Dryer.
Dryer Model Numbers & Identification
Locate your model number! Identifying your specific Whirlpool Cabrio dryer model is crucial for accessing the correct parts and support. The model number is typically found on a label located inside the dryer door frame, or on the back of the appliance.
This number helps determine compatible accessories, warranty details, and specific instructions. Refer to this number when contacting customer support or ordering replacement parts for accurate assistance.
Installation Guide
Proper installation is key! Before operating your Whirlpool Cabrio dryer, ensure it’s correctly installed. This involves carefully unpacking the dryer, removing all shipping materials, and positioning it in its designated location.
Verify adequate space for venting and electrical connections. Follow the detailed instructions within this manual for venting requirements, electrical connection (240V), and leveling the dryer to prevent vibrations and ensure optimal performance.
Venting Requirements
Efficient venting is crucial! Your Whirlpool Cabrio dryer must be properly vented to the outside to prevent moisture buildup and ensure safe operation. Use rigid metal ductwork, minimizing bends and keeping the vent length as short as possible.
Avoid plastic or foil venting, as these pose fire hazards. Ensure the vent is not crushed or obstructed. Follow local building codes regarding vent termination and external hood requirements for optimal airflow.
Electrical Connection (240V)
Caution: Electrical shock hazard! This dryer requires a dedicated 240-volt electrical supply. Do not use an extension cord. A qualified electrician must perform the installation, ensuring proper grounding according to local electrical codes.
Verify the voltage matches the dryer’s specifications. Incorrect wiring can cause damage or fire. The electrical connection should adhere to the National Electrical Code (NEC) and any applicable local regulations for safe operation.
Leveling the Dryer
Proper leveling is crucial for quiet operation and preventing excessive vibration. Use a bubble level on the dryer’s top panel. Adjust the leveling legs, located at the dryer’s base, by rotating them clockwise or counterclockwise.
Ensure all four legs firmly contact the floor. Tighten the lock nuts against the dryer’s base after leveling to secure the legs. Re-check the level after adjustments. An unleveled dryer can cause noise and potential damage.
Control Panel Overview
The control panel is your interface for operating the Cabrio dryer. It features a Cycle Selector Dial to choose pre-set drying programs, and several Option Buttons to customize your cycle. Indicators illuminate to show selected settings and cycle progress.
Familiarize yourself with each cycle and option for optimal results. The panel’s layout is designed for intuitive use, providing clear visual feedback during operation. Understanding these controls unlocks the dryer’s full potential.
Cycle Selector Dial Explained
The Cycle Selector Dial offers a range of pre-programmed drying cycles tailored to different fabric types and needs. Options include Normal, Delicate, Bulky/Sheets, Timed Dry, and more specialized settings. Each cycle automatically adjusts temperature and drying time.
Rotating the dial selects the desired cycle. Refer to the full cycle guide for specific recommendations. Proper cycle selection ensures optimal fabric care and prevents damage, maximizing the lifespan of your clothes.
Option Buttons & Indicators
Enhance your drying experience with various option buttons! These include Wrinkle Shield, which periodically tumbles clothes after the cycle ends to minimize creases. Indicators illuminate to show selected options and cycle status.
Other options may include moisture level adjustments and temperature settings. The control panel’s indicators provide real-time feedback on the dryer’s operation, ensuring you’re always informed about the drying process and cycle progress.
Operating Instructions: Using Dryer Cycles
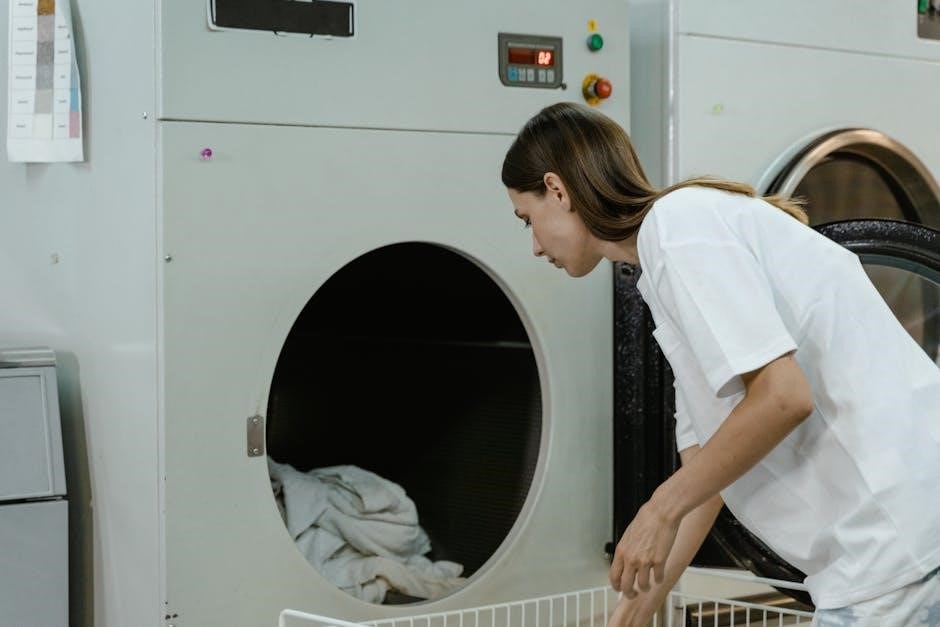
Begin by sorting laundry and selecting the appropriate cycle on the dial. Load the dryer, ensuring it’s not overfilled for optimal airflow. Press ‘Start’ to initiate the cycle. Monitor the progress via the display.
Different fabrics require specific cycles – delicate items need gentle heat, while bulky items benefit from extended drying times. Always consult garment care labels before selecting a cycle to prevent damage and ensure best results.
Normal/Regular Cycle
The Normal/Regular cycle is ideal for everyday cotton and linen items. This setting utilizes medium heat and a standard drying time, effectively removing moisture while minimizing wrinkles. It’s perfect for towels, t-shirts, and jeans.
For heavily soiled items, consider pre-treating stains before drying. Avoid overloading the dryer; a properly loaded machine ensures even drying. This cycle provides a balance between efficiency and fabric care, delivering consistently fresh laundry.
Delicate/Gentle Cycle
The Delicate/Gentle cycle is specifically designed for fragile fabrics like lingerie, silk, and delicate synthetics. It employs low heat and a gentler tumbling action to prevent damage and maintain fabric integrity. This setting minimizes shrinkage and protects embellishments.
Always check garment care labels before using this cycle. Consider using a mesh laundry bag for extra protection. Avoid drying items with plastic or metal components on this setting to prevent melting or damage.
Bulky/Sheets Cycle

The Bulky/Sheets cycle is ideal for drying large, heavy items such as comforters, blankets, and bed sheets. It utilizes a higher heat setting and extended drying time to thoroughly dry these items. This cycle also incorporates intermittent tumbling to prevent items from becoming tangled.
Avoid overloading the dryer with bulky items; drying in smaller loads ensures optimal results. Regularly check for dampness and adjust drying time as needed to prevent mildew.
Timed Dry Cycle
The Timed Dry cycle allows you to manually set the drying time, offering complete control over the process. Select a drying time between 15 minutes and 60 minutes, depending on the load size and fabric type. This cycle is useful for items that don’t benefit from moisture sensing.
Monitor the load periodically to prevent over-drying, and adjust the time accordingly. It’s perfect for refreshing clothes or drying delicate items quickly.
Understanding Dryer Features
Your Whirlpool Cabrio Dryer boasts innovative features designed for optimal performance and convenience. Moisture Sensing Technology automatically detects the dampness level of your clothes, adjusting drying time to prevent over-drying and save energy.
The Wrinkle Shield Option periodically tumbles clothes without heat after the cycle ends, minimizing wrinkles and keeping items fresh until you can unload. These features enhance fabric care and simplify laundry day!

Moisture Sensing Technology
Advanced sensors within your Whirlpool Cabrio Dryer actively monitor the moisture levels inside the drum throughout each drying cycle. This intelligent system eliminates guesswork, preventing clothes from being over-dried – which can cause damage and shrinkage.
The dryer automatically adjusts drying time based on actual moisture content, resulting in perfectly dried laundry and significant energy savings. Enjoy consistently excellent results with every load!
Wrinkle Shield Option
Prevent creases! The Wrinkle Shield option periodically tumbles clothes without heat after the cycle ends. This gentle tumbling action redistributes the laundry, minimizing wrinkles and keeping items looking fresh for extended periods.
Ideal for those times when you can’t immediately remove clothes from the dryer, this feature offers a convenient solution for wrinkle-free results, saving you valuable ironing time and effort.
Cleaning & Maintenance
Maintain peak performance! Regular cleaning extends your dryer’s life and ensures optimal efficiency. Crucially, clean the lint filter after every load to prevent fire hazards and reduce drying times.
Periodically clean the dryer drum with a damp cloth and mild detergent. Wipe down the exterior with a soft, damp cloth. Proper maintenance guarantees safe and effective operation for years to come.
Lint Filter Cleaning
Essential for safety and efficiency! Always clean the lint filter before or after each load. Locate the lint filter, typically inside the dryer drum near the door. Remove the filter and gently pull off accumulated lint.
A clogged filter restricts airflow, increasing drying time and posing a fire risk. Regularly inspect the filter housing for any remaining lint and clean as needed.
Dryer Drum Cleaning
Maintain optimal performance! Periodically clean the dryer drum to remove residue buildup. Use a damp cloth with mild detergent to wipe down the interior. Avoid abrasive cleaners, as they can damage the drum’s finish.
For stubborn residue, a dryer drum cleaning product can be utilized, following the product’s instructions carefully. Ensure the drum is completely dry before operating the dryer again.

Exterior Cleaning
Keep it looking new! Regularly clean the dryer’s exterior with a damp cloth and mild dish soap. Avoid harsh chemicals or abrasive cleaners that could scratch the finish. Pay attention to the control panel and door, wiping away any spills or dust.
Dry the exterior thoroughly with a clean cloth after washing. This prevents water spots and maintains the appliance’s appearance.
Troubleshooting Common Issues
Don’t panic! This section addresses frequent problems. If the dryer won’t start, check the power cord and circuit breaker. For no heat, inspect the heating element and gas supply (if applicable).
A mid-cycle stop often indicates a blocked vent or overload. Always disconnect power before inspecting internal components. Consult a qualified technician for complex repairs.
Dryer Not Starting
Is your dryer unresponsive? First, verify the power cord is securely plugged into a working outlet. Check your home’s circuit breaker or fuse box for tripped breakers or blown fuses. Ensure the door is completely latched; a slightly open door prevents operation.
If these steps fail, consult the control panel for error codes, indicating potential internal issues requiring professional attention.
Dryer Not Heating
Experiencing cold air during drying? Begin by checking the lint filter – a clogged filter restricts airflow and can cause overheating protection to engage, halting heat. Verify the venting system is clear of obstructions; restricted vents are a common culprit.
If issues persist, a faulty heating element or gas valve (for gas dryers) may require professional diagnosis and repair.
Dryer Stops Mid-Cycle
Unexpected interruptions during a drying cycle are frustrating! First, ensure the dryer isn’t overloaded, as this can strain the motor. Check the power supply – a momentary power outage or tripped breaker will halt operation.
A blocked vent or a malfunctioning door switch can also trigger a mid-cycle stop. If problems continue, a thermal fuse may have blown, requiring professional attention.
Parts Diagram & Replacement
Maintaining your Cabrio dryer is easier with access to parts diagrams! Detailed schematics illustrate component locations, aiding in identification for repairs. Common replacement parts include belts, heating elements, thermostats, and the lint filter.
Always disconnect power before attempting any repairs. Whirlpool’s website and authorized retailers offer genuine replacement parts, ensuring compatibility and optimal performance. Safety first – consult a professional if unsure!
Error Codes & Their Meanings

Decoding error messages simplifies troubleshooting! Your Whirlpool Cabrio dryer utilizes a system of codes to indicate specific issues. For example, an “E1” code often signals a heating element malfunction, while “E2” may indicate a blocked vent.
Consult the complete error code list within this manual or on Whirlpool’s support website for detailed explanations and recommended solutions. Addressing these codes promptly prevents further damage.
Warranty Information
Protect your investment with Whirlpool’s comprehensive warranty! Your Cabrio dryer is covered against defects in materials and workmanship for one year from the date of purchase. Extended warranties are available for added peace of mind, covering parts and labor for up to five years.
Retain your proof of purchase for warranty claims. Visit Whirlpool’s website or contact customer support to register your appliance and learn more about warranty details.
Frequently Asked Questions (FAQ)
Find quick answers to common questions! Is my dryer properly vented? Why is my clothing shrinking? How often should I clean the lint filter? This section addresses frequently encountered issues and provides simple solutions.
Explore troubleshooting tips for error codes, heating problems, and cycle malfunctions. Detailed answers will help you maximize your dryer’s efficiency and lifespan, saving you time and effort.
Contacting Whirlpool Customer Support
Need further assistance? Our dedicated support team is here to help! Access our comprehensive online resources, including FAQs and video tutorials, at Whirlpool’s official website. For personalized support, call our toll-free number during business hours.
You can also connect with us via email or live chat for prompt responses to your inquiries. We are committed to ensuring your complete satisfaction with your Whirlpool Cabrio dryer.
Recycling Information

Responsible disposal is key! When your Whirlpool Cabrio dryer reaches the end of its life, please consider environmentally responsible recycling options. Do not dispose of the dryer with regular household waste.
Contact your local waste management authority or a certified appliance recycler to learn about proper disposal methods. Recycling helps conserve resources and minimizes environmental impact, supporting a sustainable future.
Important Notices & Disclaimers
Please read carefully! Whirlpool assumes no responsibility for damages resulting from improper installation, use, or maintenance of this Cabrio dryer. Modifications void the warranty.
This manual provides guidance; always prioritize safety. Information is subject to change without notice. Consult a qualified technician for repairs beyond those outlined here. Whirlpool is not liable for incidental or consequential damages.
